06 Sep 2015
With a warm sunny day forecast for Sunday - potentially the last summer day -
it was another perfect opportunity for a longer ride. Steffen had suggested a
route through the Chilterns, which promised lots of ups and downs, and brought
his vintage road bike. The weather did indeed not let us down and it was a
great day out with a rewarding if not exhausting ride of over 90km.
Unfortunately the longest downhill stretch was a very poor road littered with
potholes so we had to be very cautious and couldn’t nearly go full speed,
which was a slight downer.
For our slightly-more-than-halfway stop in West Wycombe we were rewarded with
a great view from a hill that hosts the Church of St. Lawrence and the
Dashwood Mausoleum. The mausoleum is a very fascinating and peculiar
construction, which seems somewhat out of place.
 Church of St. Lawrence
 Dashwood Mausoleum
 Dashwood Mausoleum
We gave the “Hellfire Caves” a miss, given that their lurid name indicated it
was either a family affair or a tourist trap. The admission was rather pricey
and we only had sunglasses, which aren’t exactly helping in a cave…
 Hellfire Caves
Later we passed the rather picturesque riverside town of Marlow, which seems
like a prettier and quieter version of the somewhat overly hyped Henley.
 All Saint’s Church Marlow
 The Compleat Angler
31 Jul 2015
My go-to editor for pretty much anything is vim. And like any serious vim user
I use numerous plugins to extend and improve the editing experience. Natually
there’s a cost to that, namely an increase in vim startup time. Compared to
almost any GUI application vim starts up almost instantaneously. Still I
noticed that slight delay and it had been bothering me for a while until I
finally got round to investigate and tweak.
Thankfully vim makes profiling the startup time really convenient by providing
a --startuptime flag to write timings for loading your .vimrc and plugins
to a file, which looks something like this:
times in msec
 clock   self+sourced   self:  sourced script
 clock   elapsed:              other lines

000.007  000.007: --- VIM STARTING ---
002.399  002.392: Allocated generic buffers
002.468  000.069: locale set
004.946  002.478: GUI prepared
004.954  000.008: clipboard setup
004.967  000.013: window checked
016.181  011.214: inits 1
016.187  000.006: parsing arguments
016.188  000.001: expanding arguments
016.212  000.024: shell init
017.230  001.018: Termcap init
018.203  000.973: inits 2
018.390  000.187: init highlight
022.090  002.745  002.745: sourcing /usr/share/vim/vim74/debian.vim
026.679  000.296  000.296: sourcing /usr/share/vim/vim74/syntax/syncolor.vim
026.805  001.004  000.708: sourcing /usr/share/vim/vim74/syntax/synload.vim
...
The interesting measurements are those concerned with sourcing files, so focus
your attention on the 3rd column to see where time is spent. Short of trimming
down your vimrc (mine takes about 18ms to load by itself) and cutting down on
the number of plugins, the plugin manager can also make a difference. I used
pathogen for a long time, before switching to Vundle (because it’s easier
to have your plugin manager handle Git repositories rather than having to
manually add them as submodules to your dotfile repository or similar). Then I
came across vim-plug and was intrigued by its on-demand loading
feature.
That allows loading plugins for specific file types or only on the first
invocation of a certain command. The latter is particularly useful for plugins
you don’t need to have active all the time. In my case this was particularly
useful for NERDtree and DokuVimKi, which both take a significant time to
load. Looking carefully at the startup time output I also noticed I was
sourcing filetype plugins twice! The offending line in my vimrc was quickly
found, which shaved off some additional milliseconds.
TL;DR Switching to vim-plug, getting rid of some unnecessary plugins,
loading others only on demand and uncluttering my vimrc I managed to cut down
my vim startup by more than half, from close to 250ms to only about 120ms.
23 Dec 2014
On the first weekend of December, the fine folks from resin.io put on an
Xmas IoT Hackathon at the London Fab Lab. The Fab Lab is a maker space for
digital fabrication and rapid prototyping. They host classes and events (like
hackathons) and members can use a variety of tools for wood and metal working
as well as 3D printers and a laser cutter, which you can use e.g. to cut a
gingerbread house like this one (made from real gingerbread!):

Appropriate to the occassion, the resin folks brought boxes full of hardware:

There was therefore no shortage of Raspberry Pis and all kinds of accessoires.
Teams were formed and a range of exciting hacks started taking shape. I teamed
up with Mark, a good friend and hackathon buddy, who had brought along a
Graphtec Silhouette Portrait cutter/plotter which we were intending to hack:
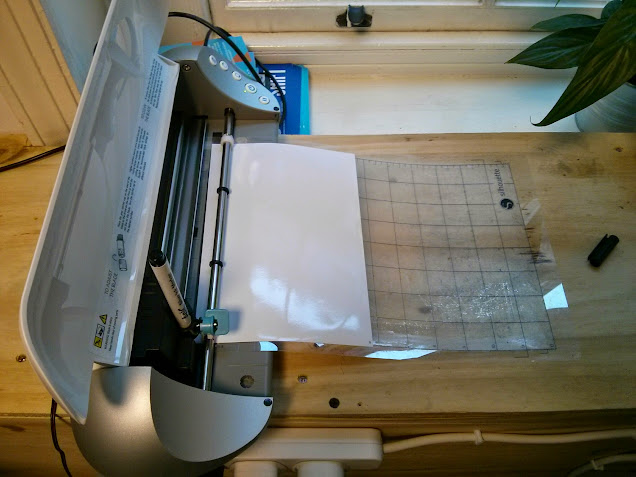
You’d normally use this to cut out shapes previously created with their
proprietary software Silhouette Studio. Of course that’s only the intended
use. Replacing the knife by a silver sharpie turns the Silhouette into an
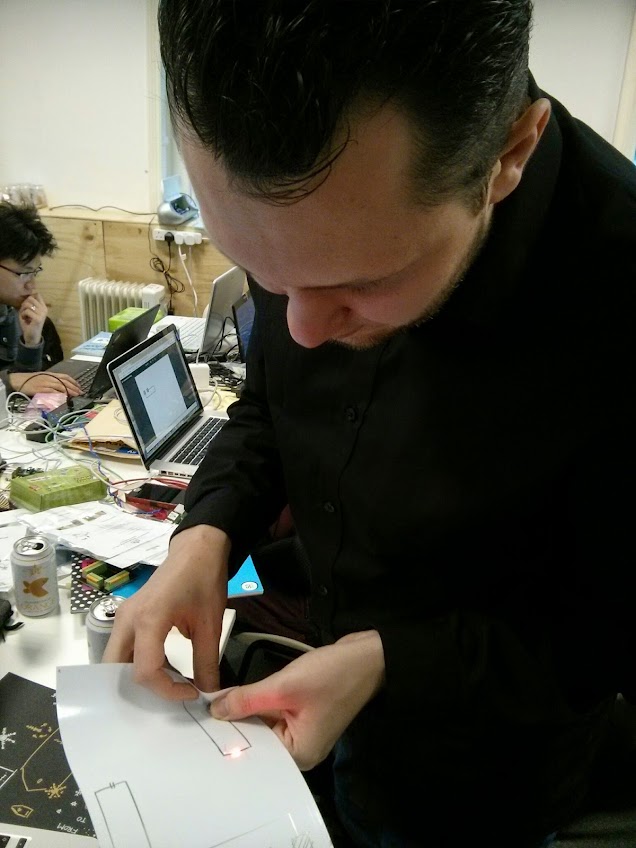
electronic circuit plotter - for very simple circuits. Here’s a
proof-of-concept circuit used to power an LCD with a button cell:
Our plan was to the Silhouette into a Christmas gift tag plotter, powered by a
Raspberry Pi. Using Silhouette Studio to drive the plotter was of course no
option. We had to find a pure command line, open source solution to generate
the template and feed it to the plotter which also needed to run on the ARM
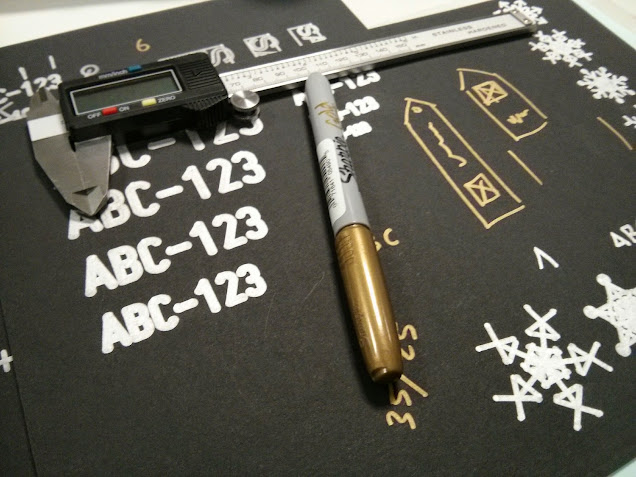
processor of the Pi. After some searching and experimenting we found a Python
based driver, which after a little tweaking was able to digest a postscript
file and get it plotted. Here are some experimental results:
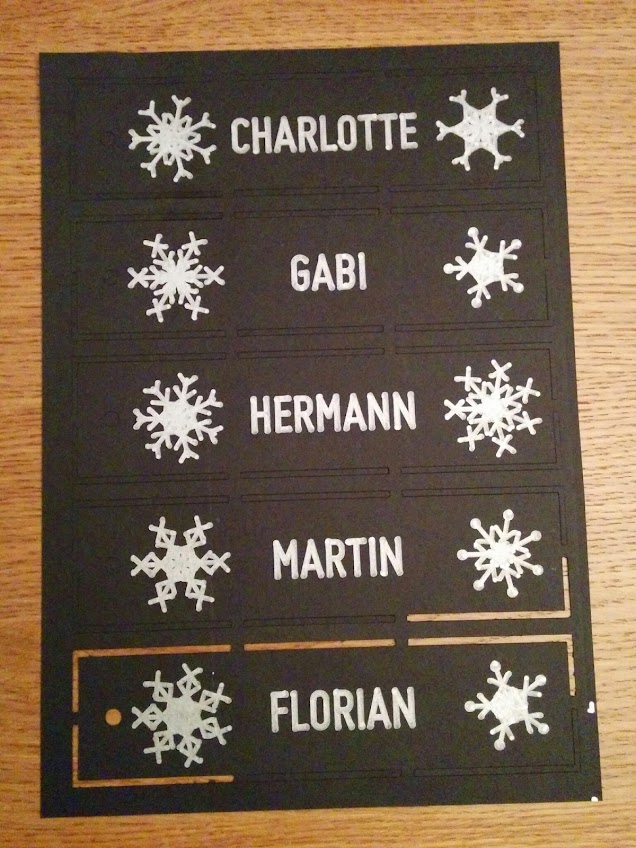
We generated the gift tags using paper.js: The user puts in five names of
friends to create tags for and we place the names, framed each by two
automatically generated snowflakes, on a canvas and have paper.js save the
canvas as SVG. Now there were only two pieces missing: one was converting from
svg to postscript, which inkscape happily does for us, even on the command
line. The final piece was then a simple node.js server to put everything
together: A form to put the names in, which when submitted generates an SVG
string, which is POSTed to the server, where it is saved to a file, converted
to postscript via inkscape and then fed to the plotter. Job done! Well,
almost, we still had to deploy it to the Pi.
Fortunately resin.io, a deployment service for IoT devices, makes that
rather simple: you create an application on the resin.io dashboard, download
the base image for your device, flash it on the SD card, pop it into the Pi
and boot it. After a few minutes the device comes online at the dashboard.
When you then push to the Git repository associated with the project, your new
code is deployed on the Pi, heroku-style, but cooler (because of the blue
unicorn and cause it run on your device!).
The device is provisioned via docker and resin.io provide a base container
(based on Raspbian wheezy) that comes with node.js preinstalled. Python, git
and inkscape are easily installed via the apt package manager and we simply
git clone the graphtec driver. The container automatically runs npm
install and when successful npm start to run our server. So far, so
straightforward, but there were two small issues to figure out: one was
installing the font we were using for the names and refreshing the font cache
and the other was detecting the printer, which required starting udevd
manually. Having that sorted, our first test was finally sucessful:
We had a really great weekend at the Fab Lab and even made the 2nd prize with
our hack. Thanks to the resin.io folks for putting it on and hopefully until
the next one!
24 Jul 2014
When using third party package repositories, you occassionally might need to
update expired repository keys. An expired key leads to an error message
during a sudo apt-get update similar to the following:
W: An error occurred during the signature verification. The repository is not updated and the previous index files will be used.
GPG error: http://build.i3wm.org raring Release:
The following signatures were invalid: KEYEXPIRED 1396011159 KEYEXPIRED 1396011159 KEYEXPIRED 1396011159
To find any expired repository keys and their IDs, use apt-key as follows:
apt-key list | grep expired
You will get a result similar to the following:
pub 4096R/BE1DB1F1 2011-03-29 [expired: 2014-03-28]
The key ID is the bit after the / i.e. BE1DB1F1 in this case.
To update the key, run
sudo apt-key adv --recv-keys --keyserver keys.gnupg.net BE1DB1F1
The repository will then be updated with the next sudo apt-get update.
06 Oct 2013
On the weekend of 4-6th October I was part of #hack4good in London
working with Chris Adams, Corinne Pritchard and Nick Stanton
tackling multi-agency reporting at refugee camps for International Medical
Corps UK with the Taarifa platform.
We approached the problem from two angles: One was developing a workflow for a
paper-based reporting system, where report forms are automatically generated
for a specific area like a refugee camp. Refugees would be able make a report
by filling in the form themselves with the help of a simple iconography to
overcome the language barrier, mark the location on a map and drop it into a
collection box. The forms are machine readable and can be digitized in an
automated process.
The other was the technical challenge of providing a platform that could
process a variety of different reports that various agencies working at a
refugee camp need to deal with from santiation over general feedback to sexual
exploitation. These can be aggregated in one place by the Taarifa API
which I’ve extended to be able to handle any report schema. Creating a new
report type is a simple as sending a POST request describing the schema to the
API in JSON format. Reports can then be submitted immediately via the JSON
API or via an automatically generated web form. All of that is live and
operational at http://api.taarifa.org.
There was quite a bit of media coverage around #hack4good: Channel
4, SkyNews and a video of the London event by Big Bang
Lab.